
How to Choose a Stable Balance Bike in 2026

Choosing a Stable Balance Bike in 2026 is less about flashy colors and more about how confidently a child can start, stop, and steer. On a level path, watch the rider’s feet: can they touch the ground easily, then push off without the bike wobbling? A low, adjustable seat, child-sized handlebars, and a manageable frame weight can make those small movements feel less intimidating. Small details matter.

Pediatrician and child-injury prevention specialist Dr. Benjamin Hoffman has emphasized safe habits for young riders. A practical principle aligned with that guidance is: “A bike should fit the child, and a helmet should fit securely.” That is a shopping guideline, not a verbatim quotation. Check the helmet fit, inspect the brakes and fasteners, and follow the maker’s age and weight recommendations. A stable bike still needs a safe riding space and close adult supervision.

This guide’s outline will look at frame geometry, tire grip, seat height, steering limits, and materials. It will also compare features that sound reassuring with those that make a real difference on pavement and packed paths. A heavy bike may seem sturdy in a store, yet feel awkward when a small rider tries to lift or turn it. There is no perfect model for every child. Measure, test when possible, and allow for a little uncertainty. A child’s comfort is useful evidence, too.
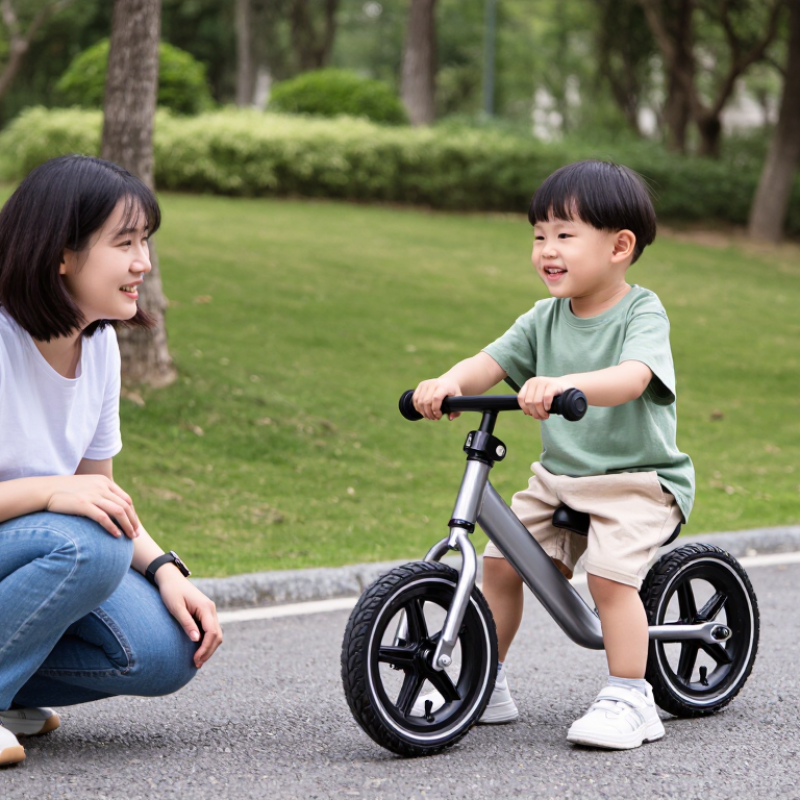
How to Choose a Stable Balance Bike in 2026

Understanding What Makes a Balance Bike Stable

How to Choose a Stable Balance Bike in 2026

Understanding What Makes a Balance Bike Stable

Stability is not just about having two wide wheels. A low, well-centered frame helps a child keep both feet flat on the ground and recover quickly after a wobble. Check the bike on level flooring: the tires should touch evenly, the steering should turn smoothly, and the frame should not tip easily when nudged. A child who can sit upright and reach the handlebars without stretching is more likely to steer with control. Fit matters.

The U.S. Consumer Product Safety Commission’s 2023 NEISS report estimated 425,910 emergency-department-treated injuries involving bicycles across all ages. That figure covers many types of bicycles; it does not measure balance-bike injuries or prove that a particular design is safer. Still, it underscores why control checks matter. ASTM F963-23 provides a recognized toy-safety framework, but standards cannot replace checking fit, condition, and supervision. A low frame alone is not enough.

Tips: Set the seat so your child’s feet rest flat, with knees slightly bent. On a clear, gentle slope, watch for straight tracking and easy stops. Check tire pressure and loose fittings often. And remember, a heavier bike may feel steadier to an adult, but can be harder for a small child to control. That trade-off deserves a real test ride.

Matching Bike Size to the Child

Matching a balance bike to a child starts with inseam, not the age printed on a box. Measure from the floor to the child’s crotch while they stand barefoot, feet slightly apart. Set the saddle about 2–3 centimetres below that measurement, so both feet rest flat and the knees stay softly bent. That matters.

Age and height are only rough clues. The CDC’s 2000 growth charts put median height near 95 centimetres for three-year-old girls and 96 centimetres for boys; by age five, medians are about 109 and 110 centimetres. Those figures describe population averages, not leg length. WHO’s Child Growth Standards likewise track height by age and sex, so use charts as context, not as a sizing rule.

Have the child sit on the bike and walk it forward on level ground. Check that they can stop with both feet, turn the handlebar without leaning heavily, and reach the grips with relaxed, slightly bent elbows. If the seat is already at its lowest setting and the child’s toes barely touch, the frame is too large. I wouldn’t trust an age label alone; children’s proportions vary, and a quick indoor fit check can still miss how the bike handles outdoors.

Comparing Frame Design, Wheels, and Tires

A stable balance bike starts with a frame that fits the child, not one that simply feels heavy. Look for a low step-through section and a seat that adjusts low enough for both feet to rest flat on the ground. A child should be able to stand over the frame without squeezing awkwardly. Shorter reach to the handlebar can also make steering feel less like a stretch. I used to think extra weight meant extra stability; on uneven paths, it often just made a bike harder to correct.

Wheel size affects how the bike rolls and how quickly a child can respond. Smaller wheels usually suit shorter riders and low-speed practice, while larger wheels may roll more smoothly over cracks. Check the fit in person when possible. A chart cannot show whether knees bump the handlebar. Small details matter.

Tires change the ride, too. Air-filled tires can soften bumps on gravel or rough pavement, but they need occasional pressure checks and can puncture. Foam tires are simpler to maintain, though some feel firm on uneven ground. A moderate tread can add grip on packed dirt without making pavement steering feel sluggish. On a clean indoor floor, deep tread may offer little benefit. Test the bike on the surface your child will actually use, and watch whether the tires slip during slow turns.

Checking Safety Features and Build Quality

A stable balance bike should feel calm when a child turns the handlebars, not twitchy or loose. Check that the frame has no sharp edges, visible cracks, or uneven joints. Press gently on the handlebar and seat; neither should wobble after adjustment. The grips should stay in place, and the ends of the handlebars should be covered. Look closely at the wheel axles and fasteners, too. They should sit securely, with no parts rattling during a short test ride.

Tips: Adjust the seat so both feet can rest flat on the ground. Push the bike forward and check that the wheels roll straight. If it has a hand brake, make sure the lever is easy for small hands to reach and squeeze. Tires should grip the surface rather than slide easily.

A polished finish can be reassuring, but it does not prove the frame is well made. Check how the bike behaves under a child’s weight, if possible, and recheck fasteners after the first few rides. A quick inspection cannot reveal every weakness. It is easy to focus on paint and miss a loose axle. Choose a bike that fits now, with enough adjustment for growth, while keeping control and a comfortable riding position.

Testing the Bike for Balance and Control

Test a balance bike on a flat, dry surface with plenty of clear space. An adult should stay close, and the child should wear a properly fitted helmet. Set the saddle low enough for both feet to rest flat, with knees slightly bent. Ask the child to walk the bike forward, then stop without help. Keep it simple.

Watch the front wheel as the child turns gently in both directions. It should respond smoothly, without sudden twitching or a heavy pull. See whether the child can steer around a soft marker and stop under control. If the bike has a hand brake, test it at walking speed. The child should reach the lever while keeping a secure grip.

Invite a short glide, then notice whether the child can lift both feet briefly and stay balanced. Look for wobbling, repeated foot-dragging, or difficulty correcting a gentle turn. These signs may reflect the bike’s fit, but a nervous first ride can affect the result too. A single smooth run is not proof. Repeat the test after a short break, and check that the saddle and handlebar remain firmly adjusted.

How to Choose a Stable Balance Bike in 2026 - Testing the Bike for Balance and Control

Practical screening guide: carry out checks on a flat, dry, open surface with adult supervision. These suggested tests are not a standardized certification test.

Test area How to test Stable, controllable result What to record
Rider fit With the child seated and wearing usual riding shoes, check whether the seat can be adjusted for their inseam. The child can place both feet flat on the ground while seated, with knees slightly bent. A low enough seat supports walking and stopping. Inseam and available seat-height range (cm); feet flat: yes/no.
Handlebar reach Ask the child to hold the grips while seated in a relaxed, upright position. The child can hold both grips without stretching uncomfortably; the handlebar turns freely without contacting the frame or the child’s legs. Comfortable reach: yes/no; steering interference: yes/no.
Wheel and steering check Before riding, check that both wheels are secure and spin freely, and that the handlebar moves smoothly from side to side. No visible looseness, binding, or wheel wobble. Inflate pneumatic tires only within the pressure range printed on the tire sidewall. Wheel play or wobble: none/observed; tire pressure checked: yes/no.
Straight-line tracking Have an adult guide the bike at walking speed over a straight, level stretch of about 3 m, then let the child try at a comfortable pace. The bike rolls smoothly without a persistent pull to one side, and the child can steer with small, controlled movements. Distance (m); persistent pull: yes/no; control: easy/uncertain.
Walking-to-gliding balance On a clear, level surface, let the child walk the bike forward and try a short glide when ready. Observe up to 3 attempts; do not push the child to lift their feet. The child can put both feet down readily and can begin and end a glide without the bike tipping unexpectedly. Attempts observed (1–3); controlled starts and stops: yes/no.
Turning control At walking speed, ask the child to make a broad turn in each direction in an open area. Steering feels smooth, the child can keep the bike upright at low speed, and the handlebar does not hit their legs. Left turn: controlled/uncertain; right turn: controlled/uncertain.
Stopping and brake check First check that the child can stop by putting their feet down. If a hand brake is fitted, test it at walking speed in a clear area. The child can reach and operate the brake, if present, and it slows the wheel smoothly. Stopping distance varies with speed, surface, tire condition, and rider. Feet-down stop: controlled/uncertain; brake fitted and reachable: yes/no/not applicable.
Post-test inspection After the trial, recheck the wheels, handlebar, seat adjustment, tires, and any fitted brake for movement or damage. No parts have loosened or become damaged. Stop using the bike and address any defect before riding again. Loose parts or damage: none/observed; follow-up required: yes/no.